Thursday, December 6, 2012

Book Page Wreath


So remember these beautiful old books?


Well, due to a secret project Jake is working on, we have a bunch of left over book pages.  And they are lovely.  So I've been hunting on the internet for great crafts for old book pages and found a few.  This one struck my fancy, though.  Seemed simple, inexpensive and the right balance beween crafty and chic.  Done. 

I made a few adaptations from the original tutorial, so I'll give you a quick run-down of my process. 

I bought a foam wreath form (with a flat, not fully rounded back) at Michaels, pulled out my trusty glue gun and got to folding.  I decided to use the pages from an old dictionary because of the graphic feel of the page layout.  One or two pages at a time I fanned the page (accordion style) and then folded up about 3/4 in of the bottom. 

 Then, hot glue that fold to the wreath form like so.  I started on the outside edge of the wreath with the pages fanning out.  And I added about three or four layers, or rows, of fans moving inward. The fold is less important at the outer edges (where you want the page to stick straight out) and more important as you move inward; the fold will create the volume you want.


Since you want the page fans to stay in place, you might have to glue other parts of the folded pages together (especially the inner, main fold like below). 

Once you reach the final row, you change tactics.  Instead of gluing the folded edge to the main part of the wreath, you fold it under, gluing it to the back as well as the foam border on the inner circle. Again, make sure you glue all the right folds and creases so that the pages stay where you want them. 


The back will look like this.


Then, tie a pretty ribbon on it and it's ready to hang!  I went with the simple look, but you could add some embellishments if you wanted. 


What a Difference a Rug Makes

I recently received an early (and remarkably generous) Christmas present from my mother-in-law.  It was big. It was floppy. It was...A NEW LIVING ROOM RUG!  I was (and still am) ecstatic.  I've been wanting to move from browns/tans to whites/greys in the front room for a while, but had to work around a nice, but very tan rug.  It was getting a little annoying.  Here's a picture to remind you of the "before".


And now the exciting "after": 


I'm really in love with the clean modern lines and the quatrafoil shape pattern. I've loved this moroccan style for a long time.  I even considered it for the backsplash tile shape in the kitchen renovation; we ended up going with a grey marble subway tile instead.  So I was delighted to have the chance to include the shape elsewhere in our home.   Now if only we could replace that weird colored sofa with something creamy and bright...


Sunday, November 4, 2012

A Saturday of Bulk Cooking

It's a little scary how excited I can get by the thought of saving money, time AND energy.  Hence my recent foray into bulk cooking (& freezing) easy meals.  I usually enjoy the prep involved in cooking dinners at home, but breakfast and lunch are a different story.  Mornings are rushed and lunches need to be microwavable.  So I decided to spend a couple hours last saturday cooking and assembling about 20 breakfast burritos and 18 veggie burgers.  I had been wanting to try a couple vegetarian burger recipes anyway, so I took as the perfect opportunity.

First for the burritos.  These were easy.  I scrambled 8 eggs, sauteed 2 peppers and 2 onions, cooked 8 links of maple sausage and roasted some sweet potatoes.  Add some cheese and flour tortillas and you've got yourself an breakfast burrito assembly line.

Collecting the ingredients. 

Assembly commence!

I flash freezed them for about an hour and then individually wrapped in saran wrap, labeled with a "V" for veggie or an "S" for sausage.  From frozen, they take about 1.5 minutes in the microwave, but for a more even heating, defrost overnight and heat for about 45 seconds.  In a pinch, we eat them wrapped in a napkin on our commute to work, but with a few more minutes and some sour cream and salsa, we have ourselves a nice breakfast together.


In an effort to move more toward a whole-foods plant-based diet (which I hear is good for you for all sorts of reasons but while cheese and I may take short breaks, I could never divorce it; even if it gives me cancer) I decided to go for a lentil and barley burger with carrots, onions and parsley.  Since I already had the produce, a quick trip to Whole Foods for the dried lentils and barley (only $1.99 per pound, by the way; maybe the cheapest thing at Whole Foods) was all I needed to get moving.


In addition to the lentils, barley, shredded carrots and onions, these burgers call for tomato paste, Panko bread crumbs, eggs and a smattering of garlic and spices.  I added some lime juice for some extra acid.  The patties were pretty crumbly and hard to form, but I flash froze them for a couple hours and then they were easy to wrap up individually.

Fresh patties on wax paper, waiting to be flash-frozen. 
The verdict on these guys is positive, although with some reservation.  As burgers, they were difficult.  Once thawed, the patties did not stay formed while I browned them on the stovetop.  So I went with it and decided to make it a "hash" instead of a burger.  This was much more successful.  Fry up the hash in a little bit of oil and you have a hearty, healthy meal.  The flavors are great (although I'd add a dash of salt and pepper before serving) and the texture, once fried up, is nice and slightly crispy. I've even been eating them for breakfast lately.

Here's the original recipe, from All Recipes, which I followed pretty closely.

Also good to note: 20 breakfast burritos doesn't actually last you that long, as I had hoped.  When your husband eats two in the morning most days of the week, your stock will quickly be depleted.  Maybe next Saturday will be another bulk cooking day.  But this time I'll double my recipe.   


Painting the Buffet


I've been hesitant to try my hand at painting furniture.  My fear was that my laziness and inexperience would get the best of me and I'd end up with a splotchy, messy, half-painted piece of junk.  Well, emboldened by the many encouraging Pinterest posts that promised me painting furniture was "easy as pie" and "fool-proof", I decided to take a gamble on transforming an old clunky dark wood/laminate server into a bright, white buffet for the dining room.  Here's how it went.

Before: although this photo doesn't really show the full (ugliness of the) buffet. 

I used the blog "Young House Love's" posts on painting furniture to guide my adventure. And now I can confidently say that the most important thing you will do in  painting your furniture is buying the right products. You might be tempted, as I was, to go for the cheaper stuff.  Don't do it.  It'll take way more coats to get the same coverage and durability.  At Young House Love's recommendation, I bought Zinsser's oil-based cover stain primer and a quality semi-gloss interior latex paint and they worked great.


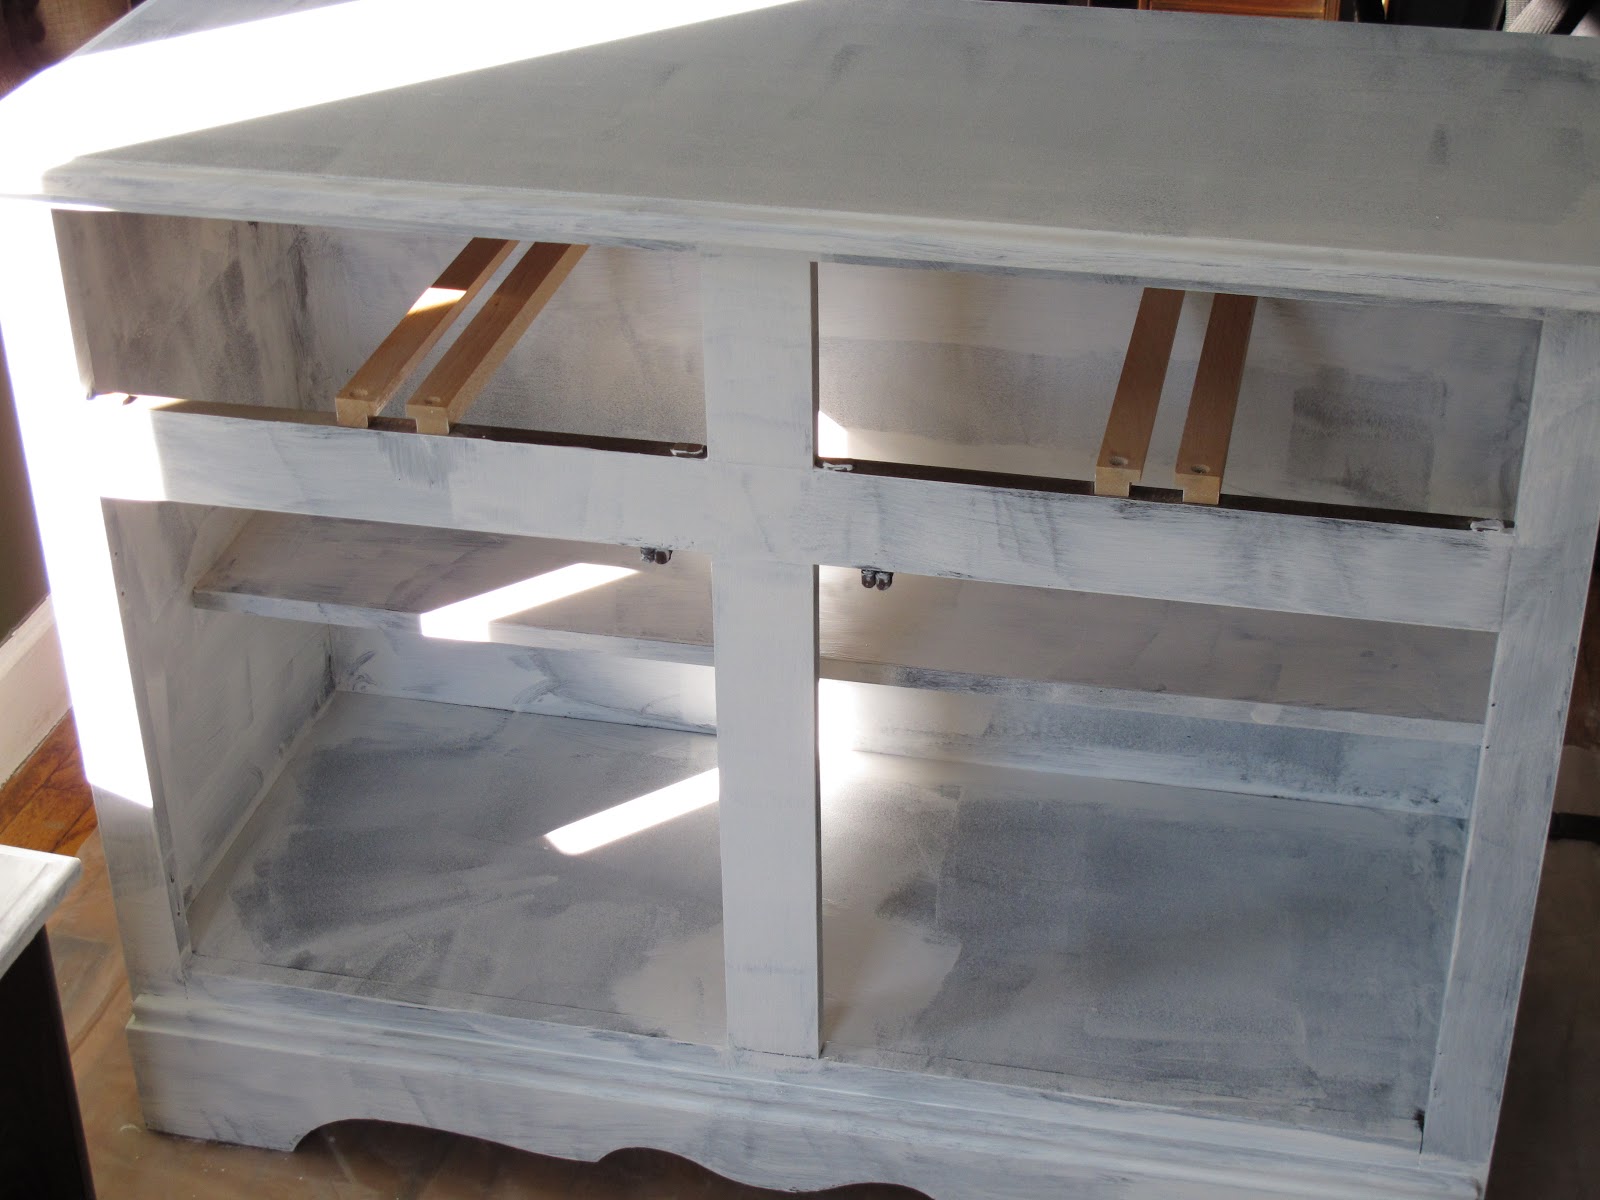
After removing the doors and drawers and taking off the hardware, I wiped everything down and then started with a couple coats of the primer.  And no: I didn't sand.  That's why the Zinsser's is so great: no sanding required to get great coverage.  Although I will say oil-based is a b*tch to get off skin and paint brushes. You'll definitely need paint thinner.

I used a brush for the nooks and crannies but a small 6-inch foam roller for the rest.  As you'll see below, after the first coat I was worried.  It was splotchy and transparent and I worried that the whole project was ruined.   But the second coat worked wonders.  Stay the course, friends.

After one coat of primer: Not looking too great. 

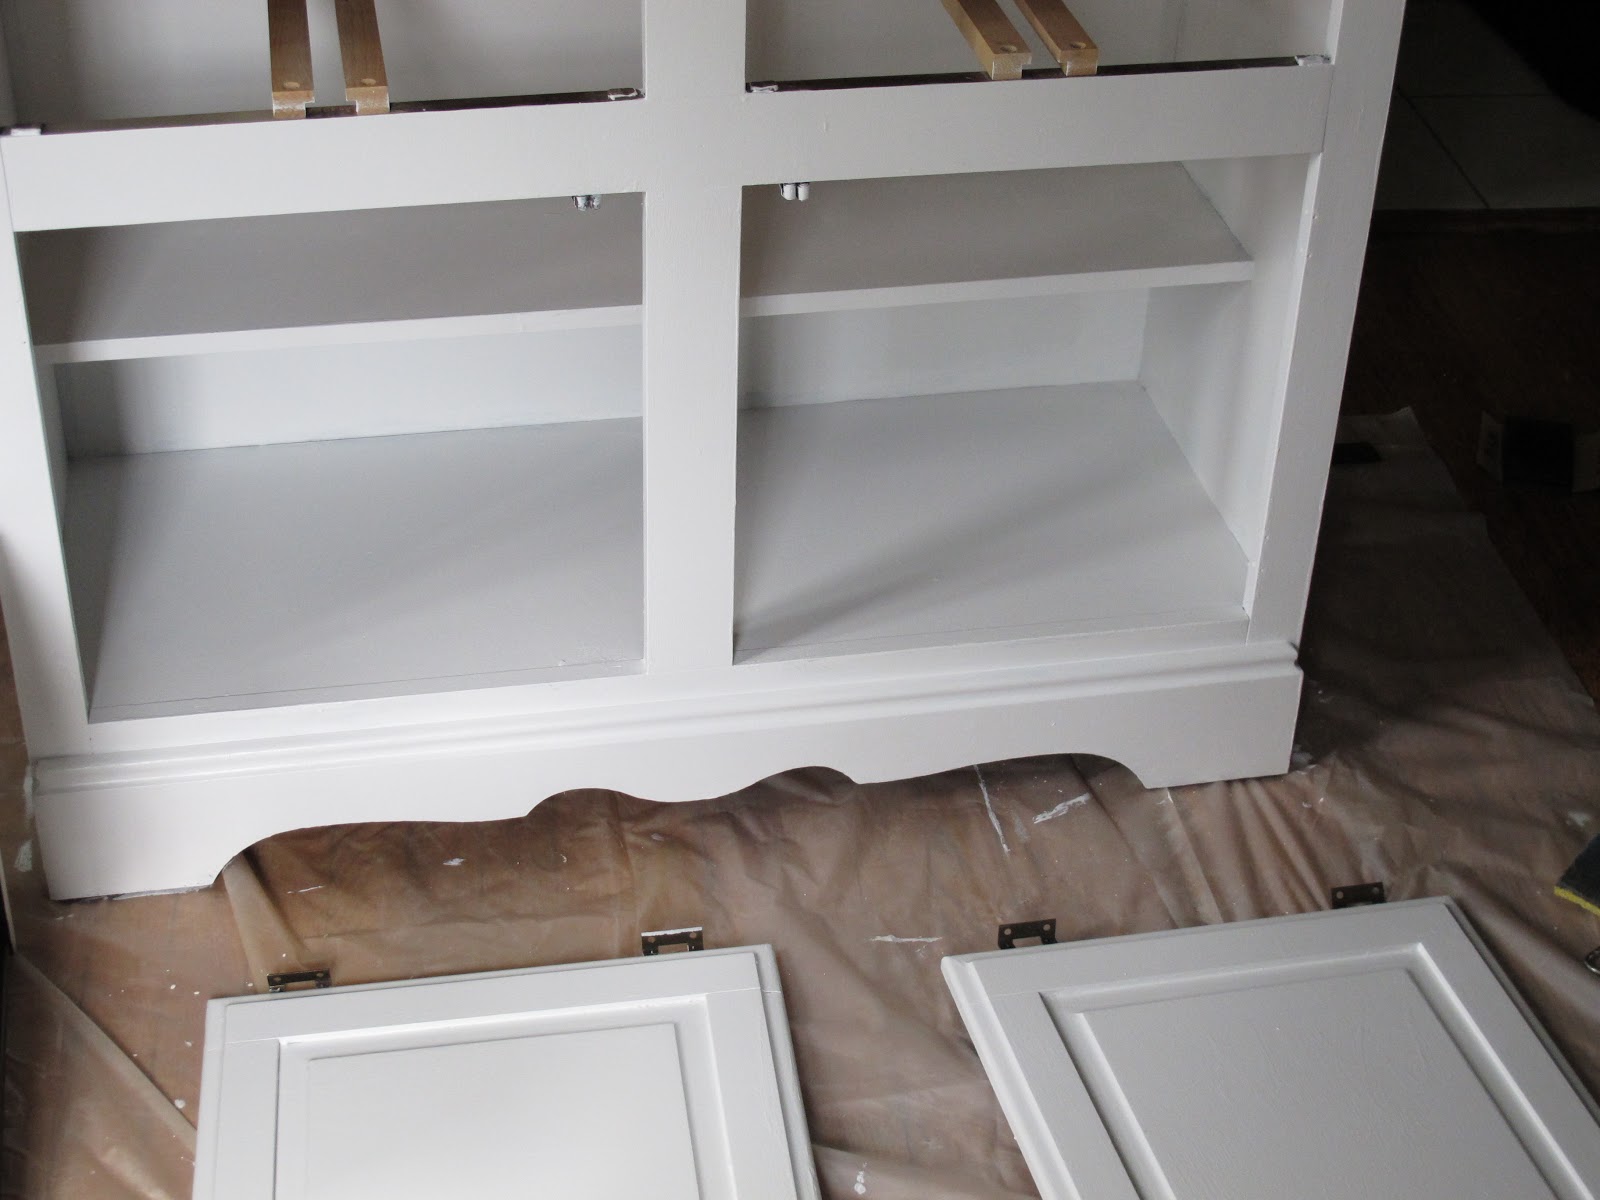
After two coats of primer: much better. 
The primer was a quick drying, requiring only a two hour dry time between coats, so I also got two coats of paint in that same afternoon.  I just used a bright semi-gloss white by Olympic.  Worked just fine.  Then, boosted by the success of my efforts so far, I decided to add a faint gray accent (Gentle Rain by Behr) around the insets of the doors and drawers.  I taped the edges and brushed in two coats of the tinted paint. In the bright sunlight, it was hard to tell the difference between the gray and the white, but where it sits now, the gray worked nicely as a subtle contrast to add a little bit of interest.


In anticipation of all the bumps scrapes this guy will get as a server and buffet, I decided to finish the whole piece with two coats of a clear protective finish. I used Minwax Water-Based Polycrylic Protective Finish, rolling it on with the small foam roller.  I added four glass knobs from Home Depot and called it a day. 

All in all, the project took about $55 and 8 hours over two days to complete, and I'm pretty pleased with the result.  It really brightens up an otherwise dark corner of the dining room.  


 In addition to the new paint job, this little guy also got a some new accessories by way of three antique mason jars and an old cheese box, snagged for $10 total at an estate sale. Also, I pruned the rose bushes out front for winter giving the jars the perfect finishing touch.


Speaking of fun cheap antiquey finds, look at what my husband and I snagged at a thrift store this weekend.  They're waiting to be transformed for a fun Christmas project, but for now they're keeping our hearth company. Anyone up for learning some histology? 


Monday, October 1, 2012

Adventures in Canning (or, the journey of a green tomato)


With the cooler, autumn weather approaching,  I decided to clean out & winterize my vegetable garden this weekend.  The tomato plants, especially, had grown very bushy and were overflowing out of the raised bed, over the fence and into our neighbors yard.  And the past few tomatoes had sat--firm, green and unripe--taunting me for weeks. It was time for them to go.

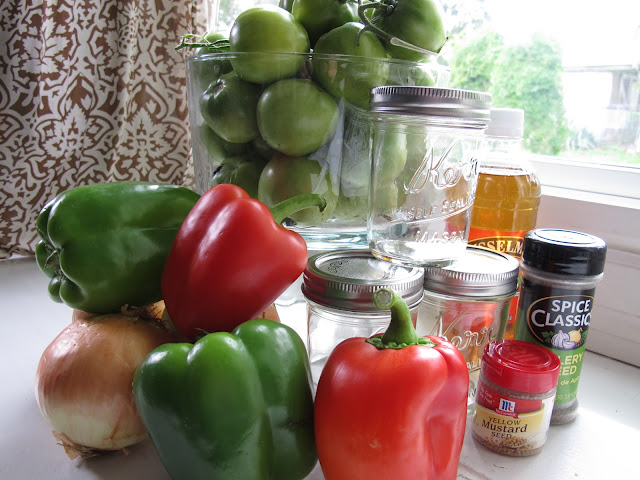
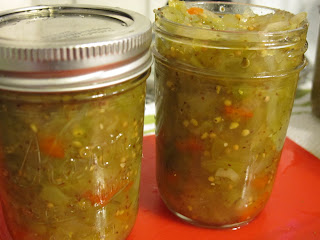
But as I started yanking up plants and vines, I started noticing more than just a few unripened green tomatoes.  I rescued almost 40.  Initially, I was a little bitter; I missed out on 40 delicious vine-ripened tomatoes?? What a waste. But after a little research I discovered Green Tomato Relish, which is evidently how many gardeners choose to use end-of-the-season tomatoes.  Dice up a bunch of green tomatoes, onions, peppers, season, simmer in vinegar, store in cans and you're good to go.  Sounded like the perfect Sunday afternoon activity to me.

Some rescued veggies. 
Well, let me tell you: the original vision for a leisurely, 2-hour relish-creating afternoon quickly turned into a 5 hour-long saga. Canning, as it turns out, is no simple task.


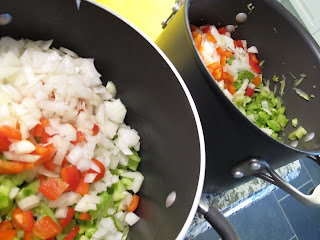
First, of course, you have to chop up a BUNCH of veggies.  I washed and cored about 35 small-medium sized green tomatoes and then diced them, alongside three red bell peppers, three green bell peppers and six large yellow onions.  That's about 45 minutes worth of chopping.  


I had so many veggies that I actually had to separate the recipe into two 6 quart stock pots.  


To each pot, I added 1.5 TB of celery seed, 1.5 TB of mustard seed, .5 TB salt, 1 cup of cider vinegar and 2 cups of sugar. Yeah, I know; the amount of sugar surprised me too.  And I even reduced the amount of sugar in the recipe by a couple cups. I brought the pots to a boil and then reduced to a simmer for about an hour and a half.  During which time I started researching canning; and started to see my relaxing evening dissolve away. 


Canning is evidently all about being sterile.  First you have to boil all your mason jars and lids. "Even brand new, never been used jars?" You ask.  Yes. Even brand new jars.  So instead of plopping them all into boiling pots of water for 30 minutes, I opted for a slightly simpler method: the dishwasher.   Plus, my only two big stock pots were already in use.  According to some website, the water gets hot enough in the dishwasher to sufficiently sterilize the jars and lids.   So, one hour later, I have clean jars.

But then you have to fill the jars with the relish and pack down the relish to remove air, and you have to do it quickly, so as not to contaminate the contents. Then you screw on the lids and submerge the filled jars in boiling water for another 15-20 minutes. This combination of heat and pressure is what creates a vacuum seal on the jars, to preserve the contents without refrigeration.  Then, as the jars cool down, you hear the "pop" of the seal snapping down, which for me, was the much anticipated indication that my canning adventure had ended. So, you ask, how's it taste?


Better than expected, honestly.  We had some with our BBQ pulled pork sandwiches for dinner and it added a nice tangy dimension.  It's probably best on meats (hot dogs, bratwurst, burgers, fish), but I bet it'd be tasty with goat cheese and crackers, too.  Verdict: if you have an afternoon and 40 green tomatoes to kill, give it a go.  If not, stick to fresh salsas with ripened tomatoes.  Or bug me for a jar; my plan is to give most of the jars away as gifts. 


{PS: here's the original recipe from AllRecipes. I made a few minor changes noted above.}


Saturday, September 29, 2012

The Big Kitchen Reno


Kitchen renovations are no joke, people.  They are expensive (about 2 times what we originally anticipated), long (about 2 weeks longer than we planned) and stressful (washing your dishes in the bathroom sink & having your refrigerator in your dining room, stressful). But, oh the blissful relief when you come out on the other side of it all with a kitchen you LOVE to be in, cook in, chat in and eat in.  We knew we wanted to make big changes: knocking out a wall, constructing a new breakfast bar, new floors, new cabinets, new countertops, new corner stairs.  In was almost a complete "gut", except for the fact that we left the sink, dishwasher and oven in the same place as before (so we didn't have to mess with too much plumbing and gas). Also, after crunching some numbers, we decided to wait on replacing the refrigerator and oven.  It was just too expensive for now and since we were going with a white and grey color scheme, the white appliances didn't seem too intrusive.  Hopefully we can just slide new (stainless) ones into place when we're ready to purchase them. 


Here's a before. Note: makeshift "cabinets" on the right wall (separating the kitchen from the dining room), the black and white checkerboard floor, the tan "textured" walls. 


The biggest change we made was knocking out that wall and putting up new cabinets that created a pass through and breakfast bar, shared with the dining room. We went with IKEA cabinets; partially because of cost, and partially because they came standard with all the bells and whistles (soft-close, storage solutions, etc.)  We had them shipped (in all their efficient flat-pack glory), which of course meant we had to put them all together.  Aside from one incident with the base corner cabinet (which I put together  and took back apart three times, at about 1am the night before the countertops were supposed to be measured), the assembly wasn't that big of a deal.  We've been very happy with the quality and I'm so glad we went with white; it feels so bright and clean. 


Here's a shot from the dining room.  We LOVE this breakfast bar.   It's fantastic to not be closed off in the kitchen by myself while I cook.  Now Jake can sit at the bar and we can chat while I chop.   We went with a modern, grey granite.  We got it at a great price and it included a new 60/40 under mount sink. Bonus!  Our only hesitation was how bold the contrast in the granite was.  It felt more modern than other choices, but it also felt a little busy. To balance it out, we went with a more classic Carerra marble subway tile backsplash and dark grey slate floors.


Here's the corner between the two windows, before reno.  


And here it is after reno.  We wanted to do cabinets all the way to the ceiling, to maximize storage and give us a chance to do some glass front displays.  And I talked Jake into doing the chunky floating shelves for some open storage, left of the stove.  I love the way it turned out.  Now we put items we use often here: sugar, oatmeal, tea, glasses.  We designed it so it mirrors the chamfered edge of the lower open shelving to the right of the oven.


Here's the corner with the stair pass through and the sink.  Before, it was a mess. Notice the uneven rises on the (sinking, plywood) stairs.  What a joke. 

Now it feels much cleaner, sturdier and less like an after-thought.  Plus, we found a little unused space for storage...


Yep. Hidden storage drawers.  Making the most of our space was really important to us.  We wanted to make use of every available square foot.  


In the name of creative storage solutions, my brilliant designer husband came up with this "stud-cubbie" idea.  Basically, we created built-in shelves between the studs in this otherwise unusable wall.  It might be my favorite feature of the whole room.  We now use it to hold oil and vinegar, spices, and mason jars of rice and nuts.  Oh, and the occasional cute knick knack.  (Adorable ornamental tea-cup, anyone?) 


(Also, the mirror on the door to the basement serves double duty as a dry erase board to keep a running grocery list on.)


Another favorite station in the kitchen is the sink.  My mom made those glass sun catchers in the window (which I absolutely love), and I like keeping herbs and succulents on the window sill. Plus, the new sink is WAY better to wash dishes in.